Configuring Features
Video Guide
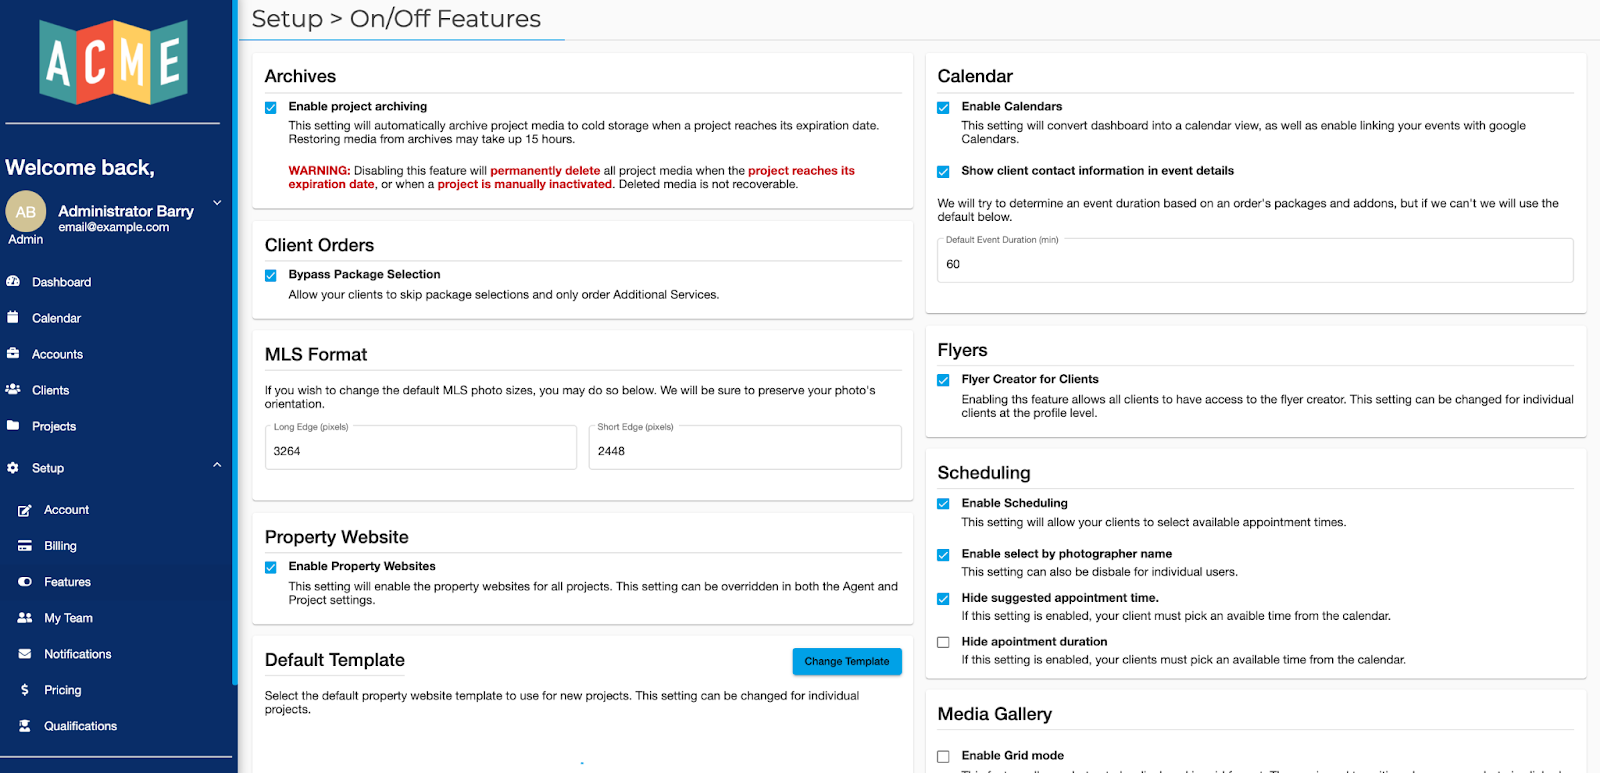
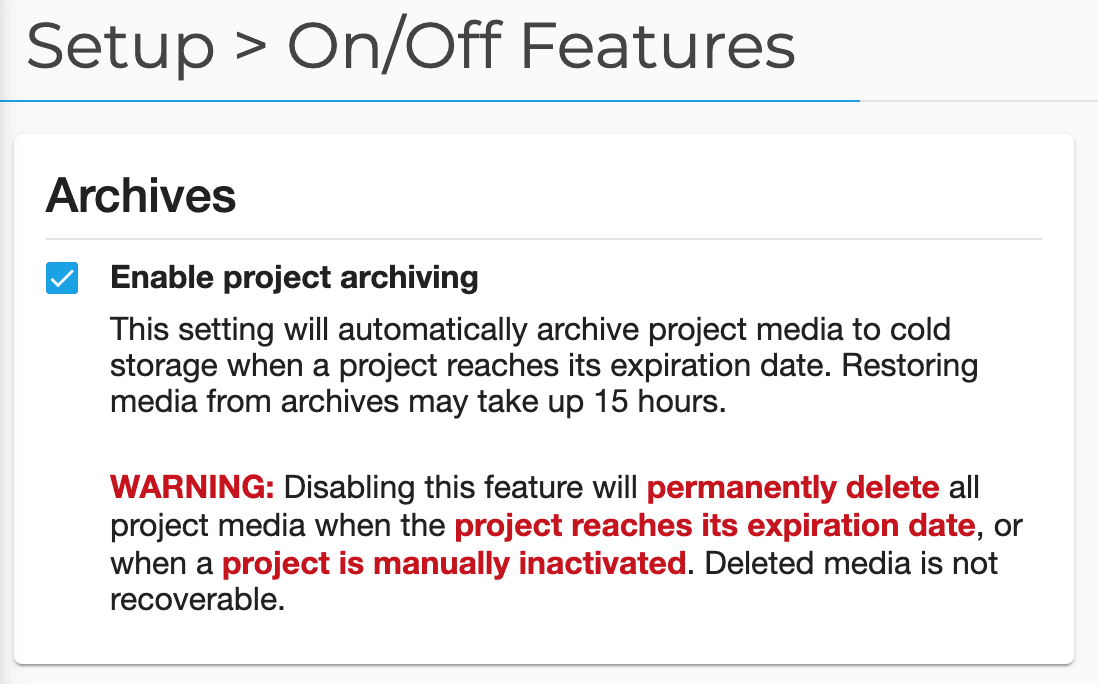
Archives
The first card we are going to be taking a look at is the Archives card. This card will allow you to opt in or out of the archival feature. Archiving does come at an additional cost however it can be useful as a backup solution to your media should a property need to be relisted for whatever reason.
This setting is Enabled by default however if you would like to disable it simply click on the checkbox so that it now displays an empty box.
If you would like to enable it after disabling it then just click the box again so that it displays filled with a checkmark.
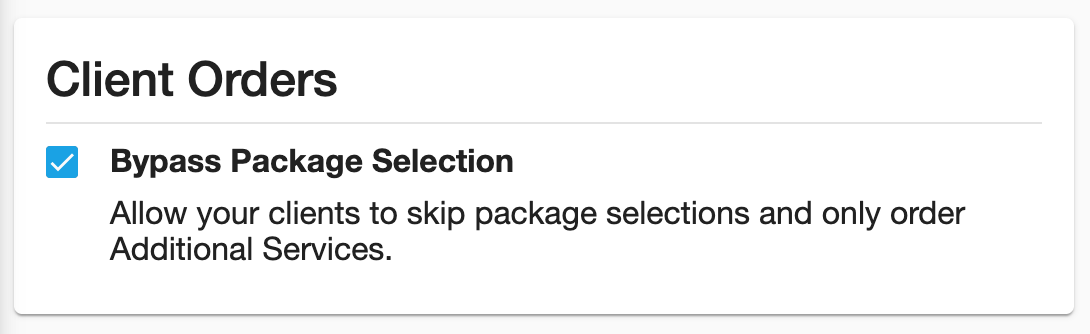
Client Orders
The second card we are going to take a look at is the Client Orders card. This card allows you to determine whether a client can or can’t bypass the package selection screen when ordering a project and only order addon services.
To enable this simply click the checkbox in the card and once it is filled with a checkmark then the bypass option will show up in the project ordering in the package selection screen.
If you’d like to disable this option then simply follow the same steps, but ensure that the box is now empty.
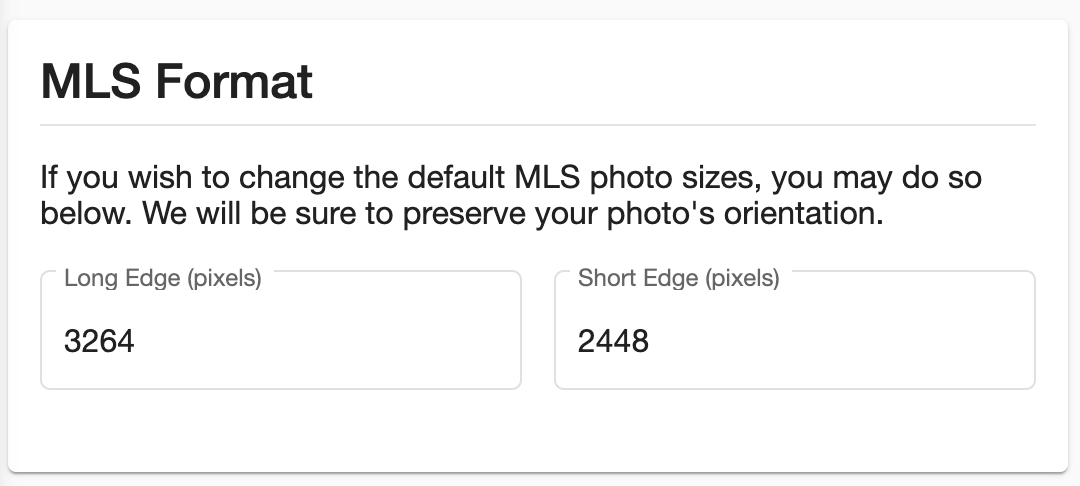
MLS Format
The next card we are going to take a look at is the MLS Format card. This card allows you to set the dimensions of the long and short side of an image that you would like the system to resize for MLS listings.
We call it the short and long side as opposed to width and height because we never change the orientation of your image and this ensures that all images stay in portrait or landscape orientation yet resizes to the same dimensions.
One important thing to consider when deciding the dimensions for the MLS format is that we prioritize aspect ratio above all else as to not distort your images or crop them.
This means that if a photo is uploaded at a 4:3 ratio but the dimensions in the MLS Format is 3:2 then the resizing function will keep the aspect ratio at 4:3 and try to get as close to the dimensions in these input fields as possible.
To change the dimensions simply input a new number into its respective field and a message will appear below when the MLS size has been saved.
You can also click away from the card to force a save.
Property Website
Below the MLS Format card is the next card we will look at and it is the Property Website card. This card is useful to enable or disable property sites across all projects on the system by default.
This is most useful if you want to offer property websites as an added cost or if you don’t want to offer them at all.
To enable or disable this feature is the same as the Archives and Client Orders card, simply click the checkbox in the card.
A filled checkbox with a checkmark means enabled while an empty box means disabled.

Default Template
The last card in this column is the Default Template card. This card allows you to select which property site template you would like to set as the default for all orders.
This can also be overridden at the project level should a client desire or need a different template. To change the default simply click the 'Change Template' button on the top right of the card and a new modal window will appear.
If you decide you don’t want to change the template you can simply click the Cancel button in the bottom right of the modal.
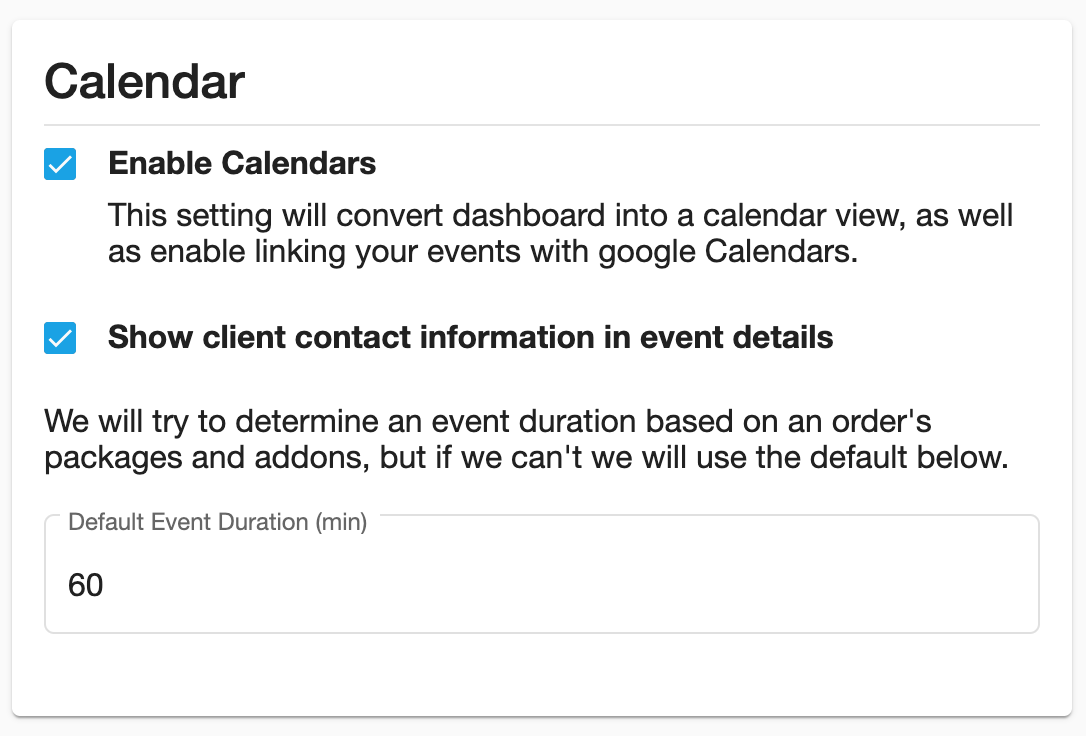
Let’s start with the first option to enable calendars, enabling this will have the calendar view show up in the dashboard and allow you to sync team members events with their Google Calendar.
This is essential if you would like that integration with Google Calendars. The second option is whether or not you would like for the client contact information to be displayed in the event details on the calendar page, this is helpful should a team member need to contact the agent for whatever reason.
Lastly on this card is the default duration for events should the system not be able to calculate it. This is essentially how long an event should last for by default.
To change this simply enter the time in minutes that you would like the calendar to book an event for in the case of a time calculation error
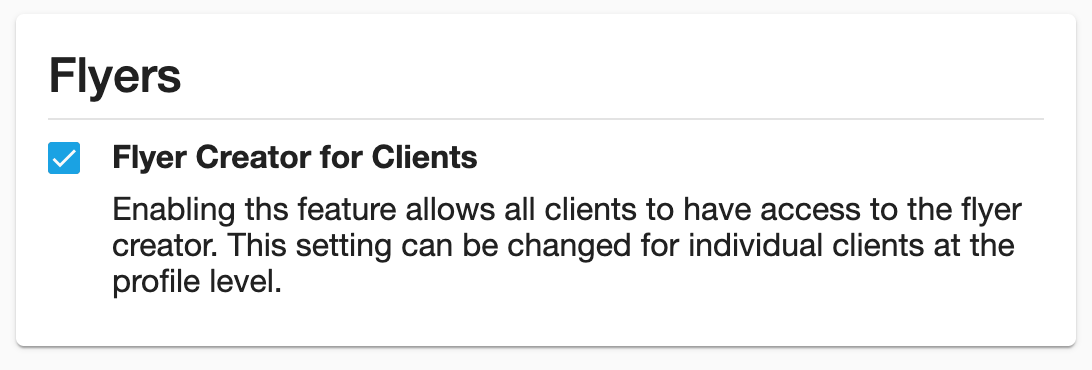
Flyers
Below that card is the Flyers card, which we will look at next. This card allows you to determine whether or not you would like clients to be able to create their own flyers using the available templates.
This is also something that can be overridden at the agent level. As before, to enable this feature simply click the empty checkbox and it will change to filled with a checkmark and to disable click the full checkbox with a checkmark and it will become empty.
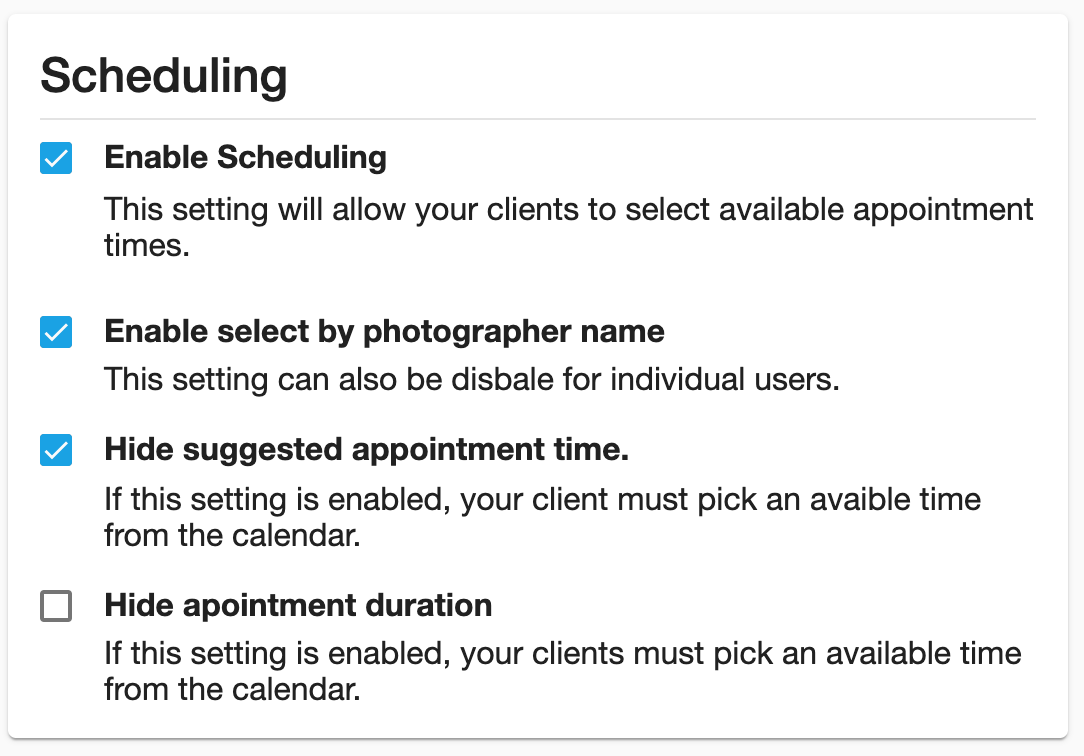
Scheduling
The next card is the Scheduling card. Here you can enable the scheduling feature along with changing some of it’s settings.
To enable the scheduler simply check the empty box so that it changes to being filled in and has a checkmark inside.
If you would like only the scheduler to choose who gets selected for the job then this option should be disabled. Enabling the third option will no longer allow your clients to be able to request a time even if all available team members are already booked and must select one from the available time slots.
Disabling this option requires the administrators on the account to confirm the requested bookings along with manually assigning a team member to those tasks. The final option on this card hides the duration of the appointment in the booking process.
This is useful if you don’t want your agents to know how long an appointment is going to take while scheduling their appointment.
Media Gallery
The last card on the Features page is the Media Gallery card. This is another card that affects the property site and can be overridden at the project level.
This card sets the default behavior for the media gallery on all property websites. The first option Enable Grid Mode changes how the media gallery is displayed.
When enabled the media is displayed in a grid rather than a large image with thumbnails underneath. Enabling grid mode also prevents the music and transitions from playing until an image is clicked on to view in full screen.
The next option, thumbnail size, only takes effect when grid mode is enabled and changes the size of the images in the grid. Next is the Enable Autoplay option, with this enabled the slideshow and music will automatically play either when the site is loaded or when the media in grid mode is clicked on.
When this is disabled the user will have to click on the play button to start the music and slideshow. The next three options are the settings for the slideshow, which include transition, timing, and music.
The transition option allows you to choose between a crossfade or a slide to transition to the next media. Timing refers to how many seconds the media stays on screen before transitioning to the next.
Lastly the music option refers to which song you would like to play, if any, while the slideshow is going on and the options are No Limit, Feng Shui, and Coming of Age or if you don’t want any music simply choose the None option.
